Understanding the Core Differences
Before diving into the specifics, it's important to understand that while both beauty tools are commonly used for applying foundation, they deliver different results. With so many different makeup brushes and sponges available, it's hard to know what to choose. I am here to help you decide which method best suits you! A smart place to start is understanding the fundamental difference in how they interact with your makeup and skin.The Mighty Makeup Brush: Precision and Control
Makeup brushes come in a dizzying array of shapes and sizes, each designed for a specific purpose. They are celebrated for their ability to offer precision and control, making them a go-to for many.Pros of Makeup Brushes:
- Precision and Controlled Application: Brushes are known for providing precise and controlled application. The bristles allow for targeted placement and optimal foundation blending. For example, if you want precision for contouring, highlighting, or even applying concealer to specific areas, a sharp makeup brush is your best bet.
- Versatility for Coverage: Brushes are incredibly versatile. For powder foundation, your brush depends on coverage. As one expert explains, “If you want light coverage, use a brush like Fenty Beauty Powder Puff Setting Brush 170 that is soft and fluffy and oversized.” Different brush densities and shapes can achieve anything from sheer to full coverage.
- Durability and Longevity: Both makeup brushes and sponges have their distinct advantages and ideal uses. Brushes are perfect for detailed, precise work and are more durable, making them a great long-term investment if cared for properly. A good quality brush can last for years.
- Less Product Absorption: Generally, brushes tend to absorb less product than sponges, which means more of your expensive foundation ends up on your face, not in the tool.
Cons of Makeup Brushes:
- Potential for Streaks: If not used correctly or if the bristles are too stiff, brushes can sometimes leave streaks on your skin, requiring more blending effort.
- Learning Curve: Mastering the art of brush application, especially for a seamless finish, can take a bit of practice.
- Can Look Heavier: Depending on the brush type and application technique, foundation applied with a brush can sometimes appear heavier or more "made up" if not blended meticulously.
The Blending Powerhouse: Makeup Sponge
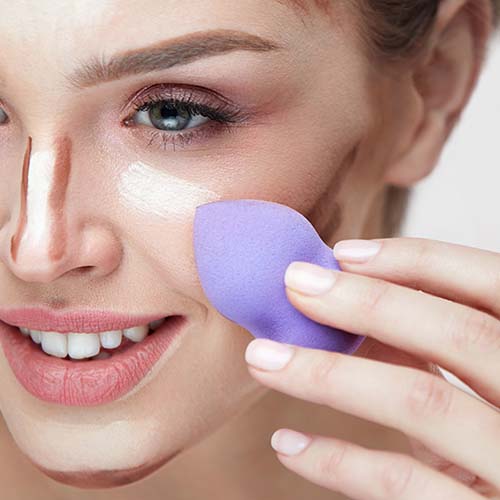
The makeup sponge, particularly the iconic teardrop shape, revolutionized foundation application for many. It's beloved for its ability to create a natural, skin-like finish.Pros of Makeup Sponges:
- Seamless, Airbrushed Finish: If you want to have a super-even blend, Sprinkle recommends using a makeup sponge. Sponges excel at blending makeup seamlessly, eliminating lines and streaks for an airbrushed finish. They are perfect for achieving a natural makeup look.
- Natural, Dewy Look: For a natural makeup look, a cosmetic sponge is often preferred. When used damp, sponges help to sheer out foundation slightly, giving a dewy, skin-like appearance that looks less like makeup and more like perfected skin. Perfect your makeup with a beauty sponge; top-rated beauty tools blend makeup seamlessly.
- Ideal for Liquid and Cream Products: Sponges work exceptionally well with liquid and cream foundations, concealers, blushes, and highlighters, helping them melt into the skin.
- Easy to Use: Sponges are generally very forgiving and easy to use, even for beginners. The "bouncing" or "stippling" motion is intuitive and quickly blends product.
Cons of Makeup Sponges:
- Product Absorption: Sponges, especially when dry, can absorb a significant amount of product, leading to more foundation being used per application. This can be a concern for those with expensive foundations.
- Less Precision: While great for overall blending, sponges offer less precision compared to brushes, making them less ideal for detailed work like sharp contour lines or targeted spot concealing.
- Shorter Lifespan: Sponges tend to wear out faster than brushes and need to be replaced more frequently (typically every 1-3 months, depending on use and care) due to hygiene and material breakdown.
- Requires Dampening: For optimal results, most makeup sponges need to be dampened before use, which adds an extra step to your routine.
When to Choose Which Tool?
Now that we've looked at the individual strengths and weaknesses, let's break down when each tool truly shines:Choose a Makeup Brush When:
- You desire precise application for specific areas like around the nose, under the eyes, or for contouring and highlighting.
- You're working with powder foundations or mineral makeup, as brushes are often more effective for buffing these into the skin.
- You want to build up coverage in specific areas without making the entire face look heavy.
- You prefer a more controlled application and want to minimize product waste.
- You're applying liquid or cream products that require a more targeted placement before blending.
Choose a Makeup Sponge When:
- You're aiming for a natural, dewy, and seamless "second skin" finish.
- You primarily use liquid or cream foundations and concealers.
- You want to quickly blend out any harsh lines or achieve an "airbrushed" effect.
- You're looking for a quick and easy application method that is forgiving.
- You want to achieve a super-even blend across larger areas of the face.
Cleaning Your Tools: A Crucial Step
Regardless of whether you choose a brush, a sponge, or both, maintaining their cleanliness is paramount for hygiene, product performance, and skin health. Dirty tools can harbor bacteria, leading to breakouts and uneven application.How to Clean Makeup Brushes:
To clean makeup brushes, begin by gently wetting the bristles of your brushes with warm water. Stiles recommends using a soapy cleanser and hot or warm water to deep-clean brushes. Swirl the brush onto the bar of a gentle soap (like baby shampoo or a dedicated brush cleanser) or into a bowl of soapy water. Gently massage the bristles with your fingers or a cleaning mat until the lather runs clear. Rinse thoroughly under warm water, reshape the bristles, and lay them flat or hang them upside down to air dry completely.
How to Clean Makeup Sponges:
Makeup sponges also require regular cleaning, ideally after every few uses. Wet the sponge completely under warm running water. Apply a small amount of liquid soap or sponge cleanser directly to the sponge. Squeeze and massage the sponge repeatedly under running water until all makeup residue is released and the water runs clear. Gently squeeze out excess water with a clean towel and allow it to air dry completely in a well-ventilated area.
Final Thoughts
The debate between makeup sponge vs. brush is less about finding a definitive "better" tool and more about understanding what works best for *you*. Both makeup brushes and sponge applicators both have their pros and cons, and the choice between them depends on personal preference, desired finish, and the type of makeup you're using. Experiment with both, understand their unique capabilities, and don't be afraid to use them in tandem to achieve your perfect flawless foundation. The journey to a perfect base is personal, and with the right tools and techniques, you're well on your way to mastering your makeup routine.- Ashley Tisdale Brenda Song
- Madame Delacroix Bridgerton
- Luke Bryan Spouse
- Cierra Ramirez Boyfriend
- Phil Hartman Brynn Omdahl